Here’s the first project. It’s a 6x6 scrapbook page with a card option for my non-scrapbookers. This vibrant designer paper is from the Floral District designer series paper. The photo is my daughter on the boat ride at San Antonio’s Riverwalk. We drove down there last year for a Mother-Daughter long weekend trip and had so much fun. {TIP: Use your bone folder to flip up the edges of the flowers like curling ribbon.}
The second project is based on my Convention Swap this year. I just changed the color scheme, embossing folder, and the edgelit used. I’ve been wanting to try out this Edgelit from the Finishing Touches Edgelits, and I like how well it coordinates with the Fancy Fan embossing folder. I paper saved on this one too by stamping and punching my embellishments out of the Whisper White background piece and the Island Indigo mat before taping them down. {TIP: If you don’t have a punch that is slightly bigger than the one you’re using but want a mat, just offset the same punched shape for a shadow mat or cut another one down the middle to separate it so it mats on two sides.}
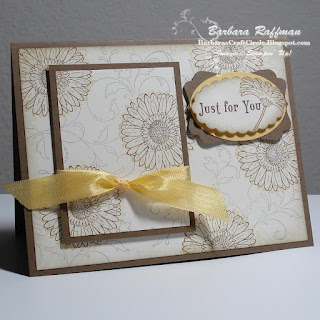
The third project uses the Reason to Smile stamp set that’s exclusive this month ($5 when you purchase $50) and uses our technique for this month. This was shared on our demo site by another demo. It’s called Double-Time or Triple-Time Stamping. You cut two or three layers of Whisper White or Very Vanilla cardstock that will layer with mats (standard ¼” larger cardstock resulting in 1/8” all around mats). Then, using temporary tape, stack and tape down the vanilla or white in the final position you want on the project without the mats in between. Stamp all over starting in the middle. Un-stack the pieces and tape to your mats. The mats will cover up the missing spots all around where the stamps went off the edges onto the next layer. Tape down or use dimensionals to pop up each matted layer. Everyone will wonder how you got the images to line up so perfectly! {TIP: For temporary tape, use your snail double-sided tape dusted very lightly with the Embossing Buddy to remove some of the stickiness.}
Here’s the photo of the monthly page for our Stamp Night Technique Journal. I used Bravo Burgundy and the Raining Flowers stamp set for the little sample and spritzed it using our new Stampin’ Spritzer filled with rubbing alcohol and drops of re-inker. We did a Triple-Time Stamping card at our quarterly Stamp’n’Share get together. I’ll post some photos from that soon.


No comments:
Post a Comment